How to use Dashlane with Proton Mail
Dashlane is a well-reviewed, closed-source, and paid-for, hosted password manager solution. In this guide we show you how to use it to sign in to Proton Mail.
Desktop
Dashlane offers desktop apps for Windows and macOS, but the default way to use Dashlane on the desktop is via its browser add-ons for Chrome, Firefox, Edge Chromium, and Safari.
1. Install the browser add-on for your browser and create a new account when prompted.
2. Click the Dashlane browser add-on icon (in Chrome this may be hiding in the Extensions dropdown menu) and click + to add a new login via the Dashlane web interface.
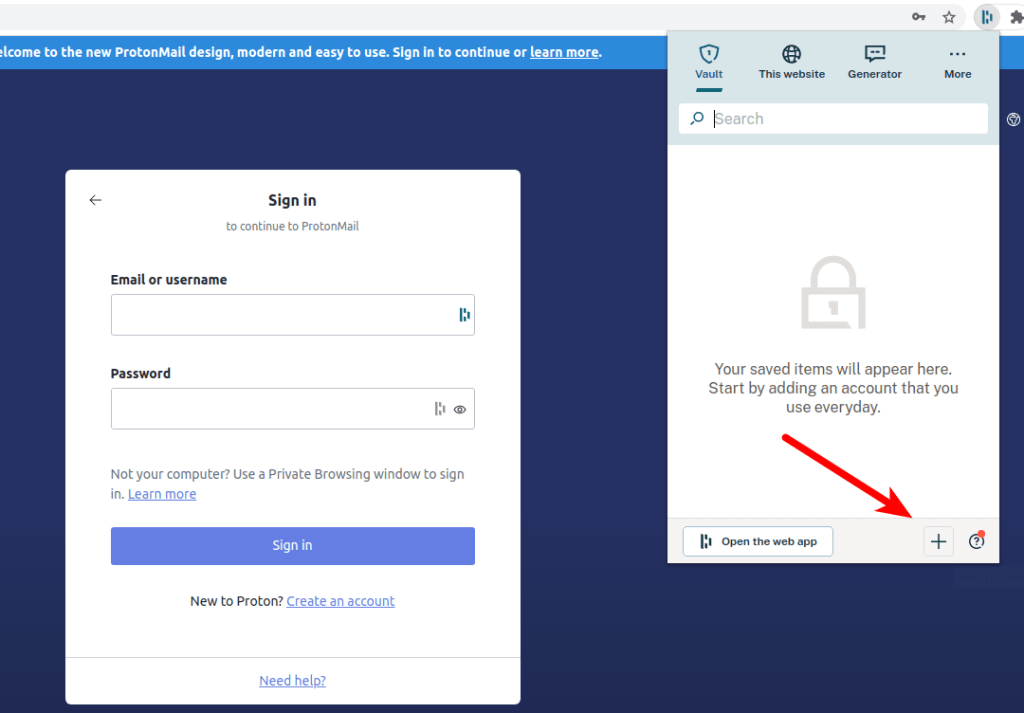
3. Enter any Name you want to call the entry (such as Proton Mail), your Proton Mail Login (username), and Password. Use https://account.proton.me(new window) for the Website address. Click Save when you are ready.
 (new window)
4. Visit account.proton.me(new window), click the Dashlane icon next to the Email or username or Password fields. Select the Proton Mail entry you just created to autofill your login details.

iOS and iPadOS
1. Install Dashlane from the App Store. Tap Get Started to register, or Log in if you’ve already done so.
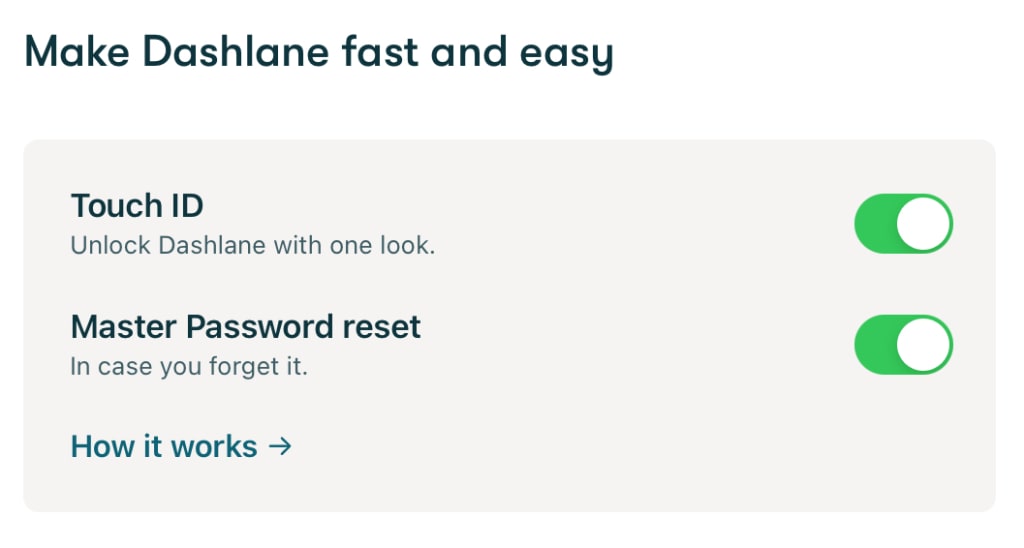
2. We recommend enabling Touch ID. This can also be used to secure your encrypted password, which is then stored on your iPhone or iPad (Master Password reset). Tap Continue when you are ready.
3. Tap Activate Autofill for instructions on how to enable password autofill in the iOS settings.
 (new window)
4. Go to Vault → Passwords and tap the + icon to add new login details.

5. When asked to pick a service you use, start typing Proton Mail, and a proton.me entry will appear. Tap it.
 (new window)
6. Fill in your Proton Mail Email (or username) and Password details, then tap Save.

7. Open the Proton Mail app and tap inside the Username field. When the iOS keyboard appears, tap Passwords.

8. Unlock Dashlane using Touch ID and select the Proton Mail entry you just created. Dashlane will now autofill your Proton Mail login details.

Android
Note that it is not possible to take screenshots of Dashlane in Android due to a security policy.
1. Install Dashlane from the Play Store. Tap Get Started to register, or Log in if you’ve already done so.
2. We recommend enabling Biometric unlock. This can also be used to secure your encrypted password, which is then stored on your Android device (Master Password reset). Tap Jump In when you are ready.
3. Enable autofill by tapping Activate Autofill→ Activate Autofill → and selecting Dashlane in Android Autofill service settings. Tap Got It when you’re done.
4. Go to Menu (3-line burger icon on top left of the screen) → Home → + Add Item → Passwords → Add manually.
5. Scroll down the list of services until you see Proton Mail and tap the icon.
6. Fill in your Proton Mail Email (or username) and Password details, then tap the tick ✔ icon to save.
7. Open the Proton Mail app, tap inside the Email or username field, and select the Proton Mail auto-fill entry.